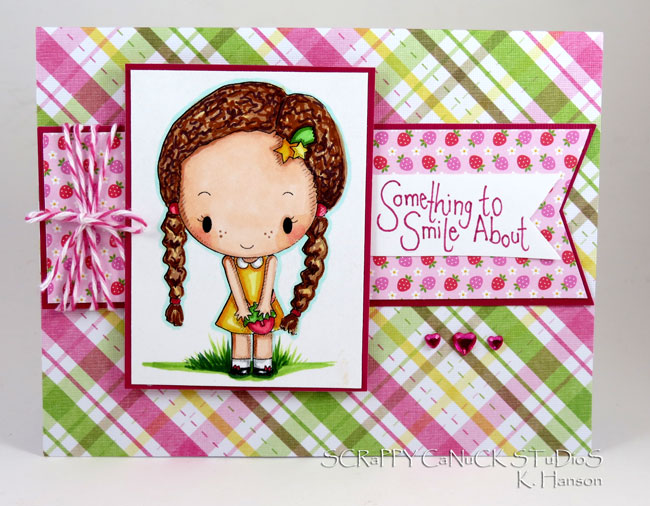
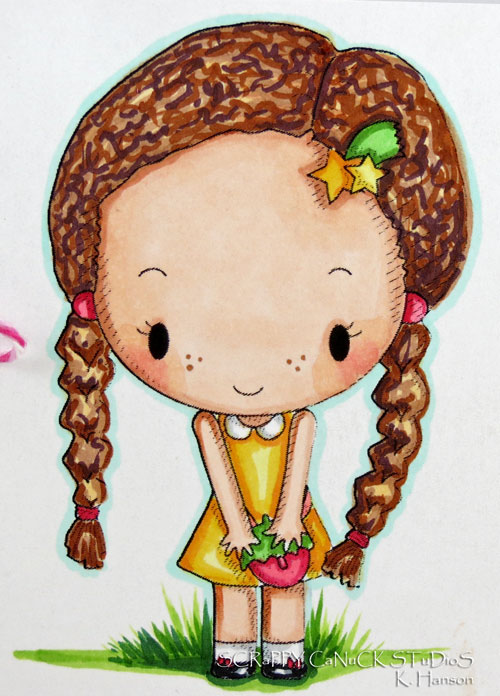
Today, I thought I would try my hand at another colouring tutorial for you featuring this cute freebie from
ChiChi Memories called
"Hello Girl".
When I first starting using Copics, my goal was to create a realistic looking Caucasian skin tone (I am working on others now too). There are many techniques out there, so this is simply one that works for me. I am all about quick and easy, so this is a technique you can use on any type of digi with different types of colouring tools too! I am using Copics, but this will work with any colouring tool that allows you to blend! Let's get to it!
Step 1
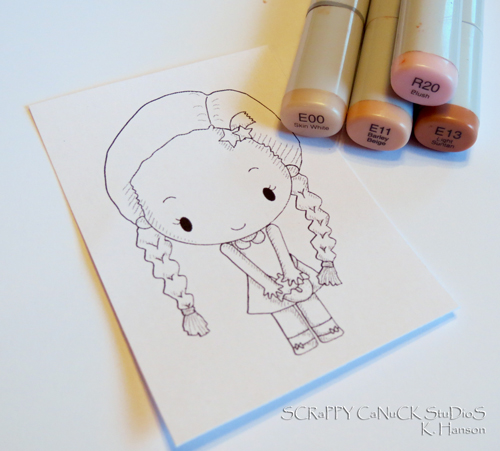
Choose 4 colours for your skin tone. The lightest colour will the one you see the most of - the others are used for definition and shading. For Copics, consider using E00, E11, E13 and R20 (this is a pink colour I use for the cheeks).
Step 2
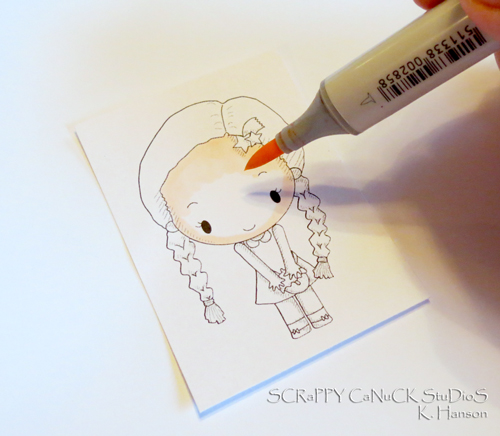
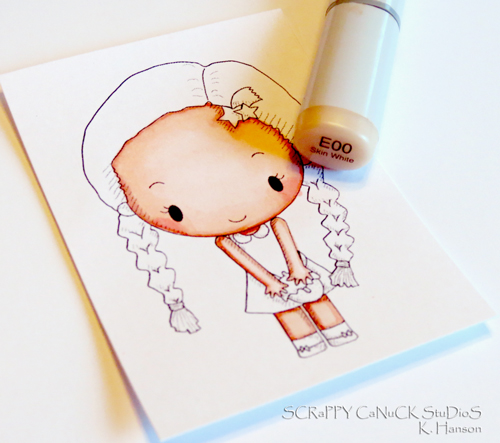
Using your lightest tone (E00) colour in the entire face area.
Step 3
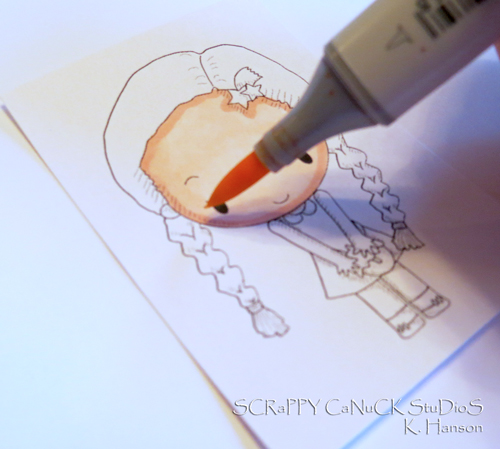
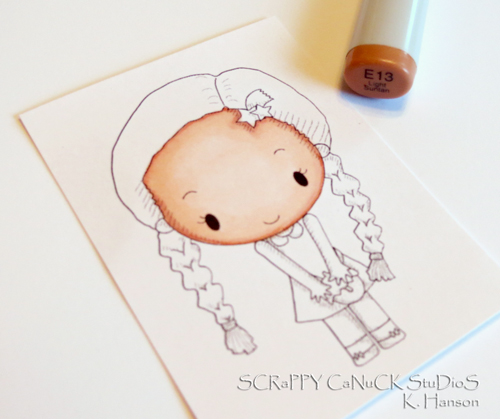
Using your second tone (E11), outline the edge of the face and along the hair line. Go back to your lightest tone (E00) and blend out the line that was created in small circular motions, moving from the line in towards the middle of the face.
Step 4
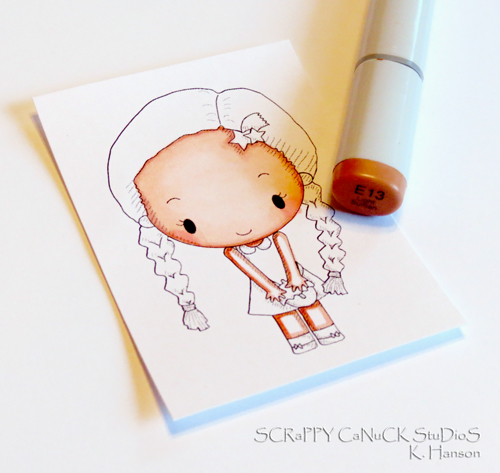
Using your darkest tone (E13), add another line around the edge of the face and hairline. Don't worry if this seems really dark...once you have the hair coloured in, this dark edge will look like a shadow. Note - I do not typically blend this colour in as I did with the second tone. I Like to have a sharper line for the shadows, but if you find this too harsh once you have coloured the hair, simply go back and blend it out.
Step 5
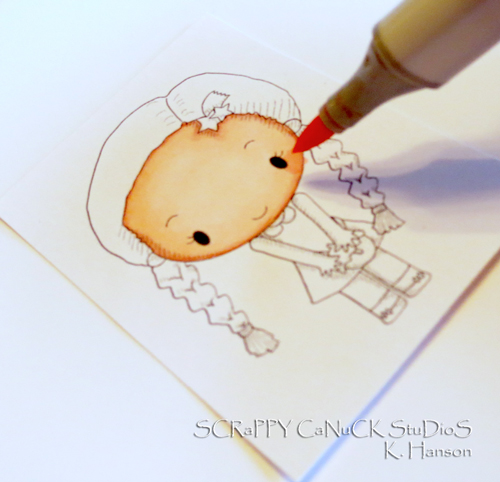
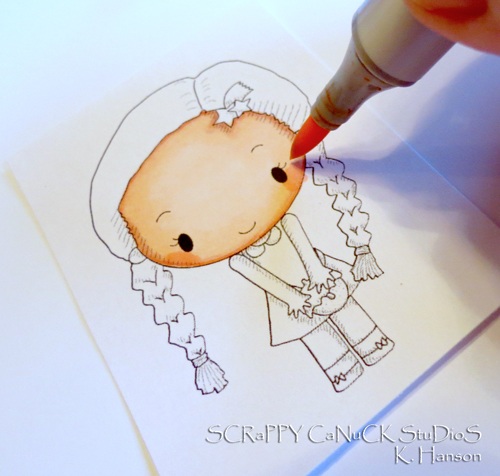
Using a light pink colour (R20), colour a small circle just below and to the side of each eye.
Step 6
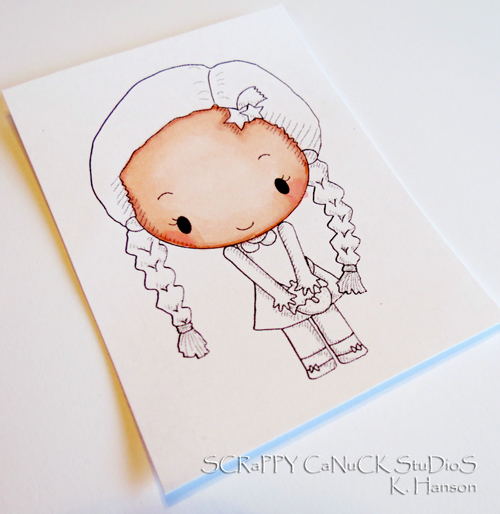
Using your lightest tone (E00), use small circles to blend out the edges of the rosy circles. I will blend all the way up to the ear line, and down towards the mouth. This will give a nice flushed look to the cheeks.
Step 7
Take a step back and admire your work. Go back and blend any spots that seem blotchy or uneven.
Step 8
For small arms and legs, I actually start with my second tone, work darker and then work lighter. There isn't a lot of room to blend, so I find this gives me the softer look I like for arms and legs.
Using your second tone (E11), outline the edges of the arms and legs. Don't forget spots against clothing or objects.
Step 9
Using your darkest tone (E13), outline one side of each of the arms and legs (the side furthest from the light sourse you would like to use). In this image, I wanted thelight source coming from the right side, so the left side of each arm and leg received a nice, thin line of E13. At this stage, also make sure you use the darkest tone against all clothing lines.
Step 10
Using your lightest tone (E00), work in small circles from the outside edges into towards the centre of each arm and leg.
And there you have it!
Experiment with different colours and tones and adding shadows in different places. It can be a lot of fun to add dimension to the face, arms and legs, so don't be afraid to play a little!
Thanks for stopping by today!