Showing posts with label tutorial. Show all posts

Thursday, October 17, 2013

Tutorial time with Karen

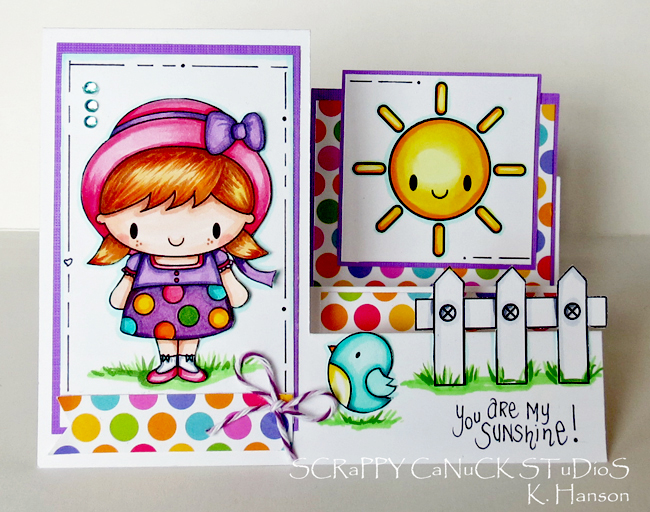
Hello CCM friends! We have a super fun card and tutorial by our amazing DT member Karen to share with you today using our new October freebie called Thanksgiving.
You can grab it HERE and join the fun!

Thanksgiving-full

I have a "two-for-one" goody of a post for you today! Not only do I get to show you the darling new FREE digi from ChiChi Memories (yup - I said free), but I also get to share a tutorial with you!

Thanksgiving-closeup

This darling little digi is perfect for this Thanksgiving season. We actually just celebrated Thanksgiving this last weeked here in Canada, and while I was cooking a turkey for my family, I looked just like her (okay, that might be a little bit of a stretch - as my preparations included a few choice words when I realized I couldn't fit the stuffing into the oven because the turkey was too big - other than that though... ;)). I coloured her up using Copics (my tool of choice for colouring), and used some cute new paper from DCWV called Modern Meadow. And the base of the card is actually a center-step card, and let me show you how you can create one too!

Thanksgiving-side

STEP 1

CCMT51

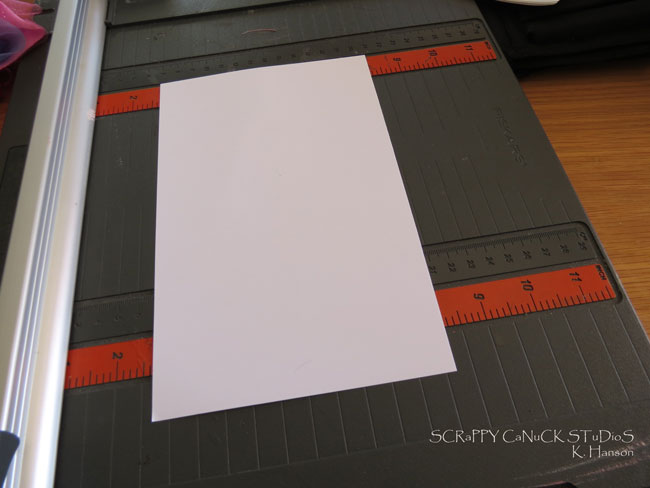
Cut a piece of 5 1/2" x 8 1/2". This will give you a standard 4 1/4" X 5 1/2" once folded.

STEP 2

CCMT52

Measure 1 " in from one of your 8 1/2" edges. Starting 1 1/4" away from the 5 1/2" edge use a craft knife (or paper cutter) to cut from this 1 1/4" mark to the 7 1/2" mark. Flip over your paper and repeat along the other 8 1/2" edge.

STEP 3

CCMT53

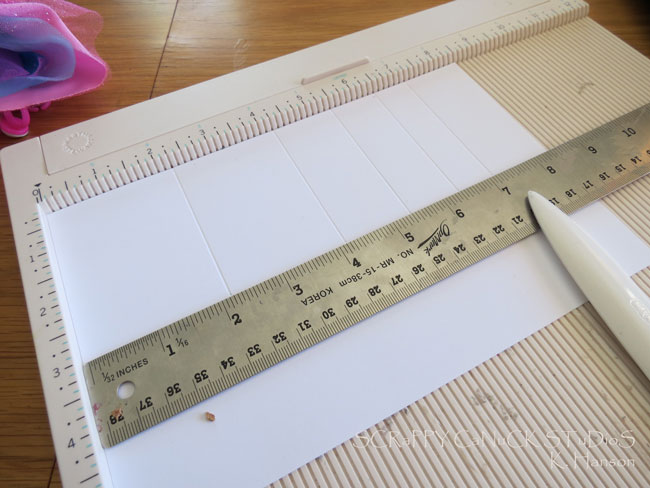
You are now going to do some scoring in the 1" border you created. Using a scoring board, create score lines at the 1 1/4" mark, the 2" mark and the 5" mark. Make sure this core line only goes from one of the 8 1/2" mark to the 1" cut line you create. Flip over your paper and repeat along the other edge.

STEP 4
CCMT54

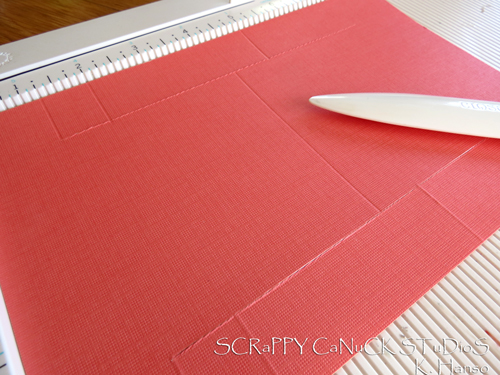
Working in the space between your cut lines, create a score mark at the 4 1/4" mark. Make sure you stop at the cut lines!

STEP 5

CCMT55

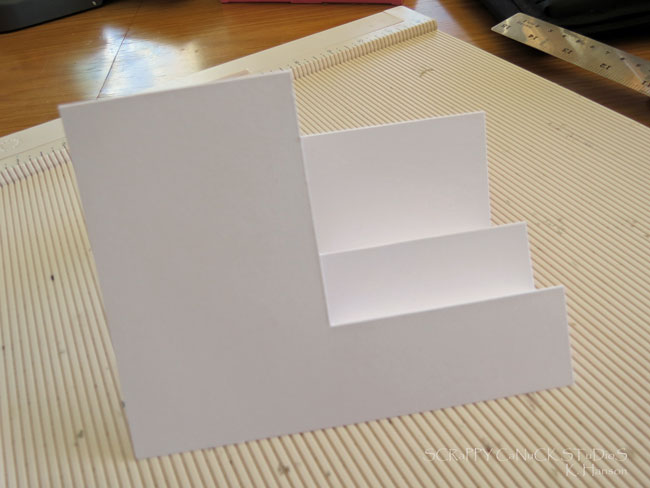
Fold your card so the 2" score line is a valley fold and all others are mountain folds. Using your bone folder to crisp up the folds. Decorate as you would like!
It's really that easy! Once you have those score lines in place you have a fun little fancy fold that fits in a regular envelope.
So, go pick up that cute ChiChi Memories freebie (and perhaps one or tow others as well ;)) and come join us for the challenge this month! We always love to see what you create!

Thanksgiving-dimension

Thanks for stopping by!
Wednesday, September 18, 2013

Hair tutorial with Karen.

Tutotrial-full

Tutotrial-closeup 

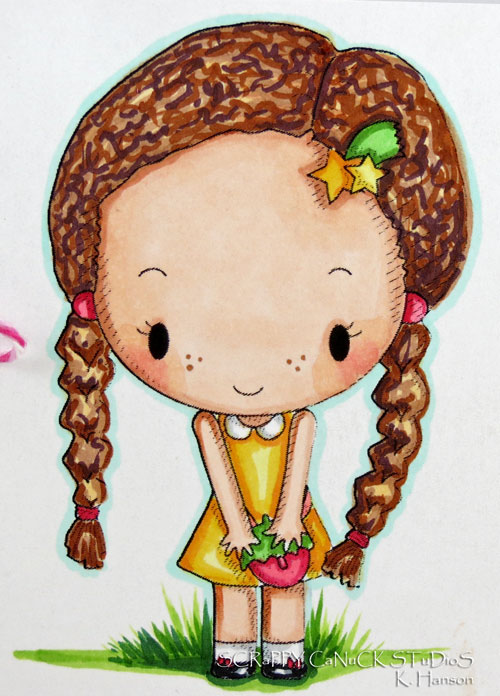
  Today, I have a quick and easy colouring tutorial for you. I recently tried my hand at colouring curly hair, and I realized that it is quite different from tackling straight or even way hair (just like in real life)! ;) I thought I would share a few thoughts on what is working for me to help get you on your way to an effect that works for you! So, without further adue - let's get colouring! ! ;) Start by grabbing a cute stamp or digi that implies a curly hair texture. Often, the image will have a wavy edge. I decided to use this adorable freebie from ChiChi Memories called "Hello Girl".

Step 1

CCMT41

Choose four colours for your hair - the middle tones will be the ones you see the most of, so choose one that is lighter and one that is darker to allow for highlights and depth. I chose Copics E23. E25, E39 and RV99.

Step 2

CCMT42

Starting with the lightest shade (E23), outline around the edges of the hair and then fill in with squiggly lines (I know - so technical)! Don't worry about leaving white spaces!

Step 3

CCMT43

Using the next shade (E25), repeat the same steps, using this next layer of squiggly lines to fill in some of the white spaces, but also to overlap the ones you have already drawn. When finished, it will look something like this:

CCMT44

Step 4

CCMT45

Using the 3 lightest shade (outline the edges of the hair once again. Using short strokes and dots, add texture to the hair. At this point, you want to make sure that most of the white is now gone.

Step 5

CCMT46

This is my favourite step because it really starts to create depth in the hair. Using your darkest shade (like RV99 - don't be afraid to use a dark colour here - even on a lighter hair colour), add short, squiggly lines and dots, focusing your strokes around the outside edges of the hair, and in any parts that would be recessed - like a part. Colour along a few of the lines you created in step five, staying on one side of the line.

CCMT47

And that's it! I think it gives a pretty good illusion of curly hair without too much effort! Four colours, four layers, and you are ready to get this cutie onto a card!
So there you have it, now go have some fun colouring hair! Thanks for stopping by today!

Tutotrial-angled

Badge_KarenHanson

Wednesday, August 21, 2013

Coloring tutorial by Karen

Challenge-full

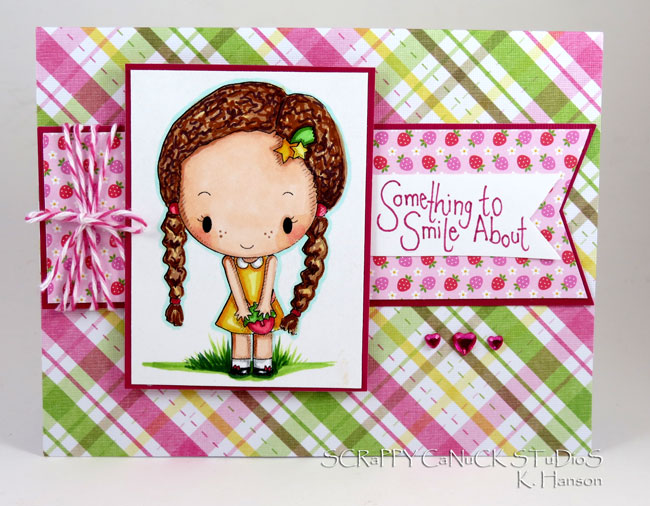
Today, I thought I would try my hand at another colouring tutorial for you featuring this cute freebie from ChiChi Memories called "Hello Girl".
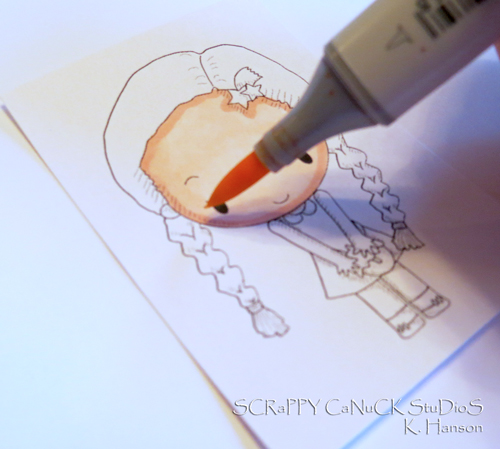
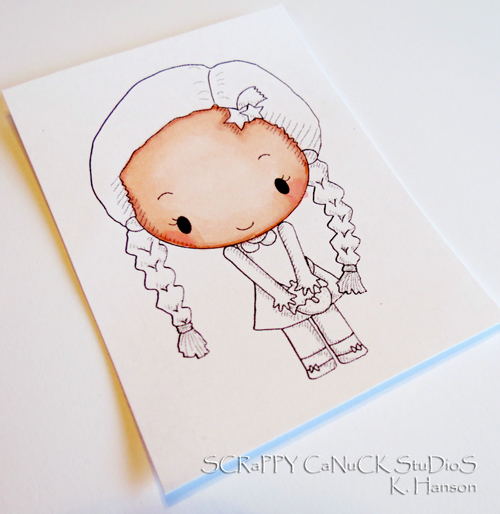
When I first starting using Copics, my goal was to create a realistic looking Caucasian skin tone (I am working on others now too). There are many techniques out there, so this is simply one that works for me. I am all about quick and easy, so this is a technique you can use on any type of digi with different types of colouring tools too! I am using Copics, but this will work with any colouring tool that allows you to blend! Let's get to it!
Step 1

CCT31

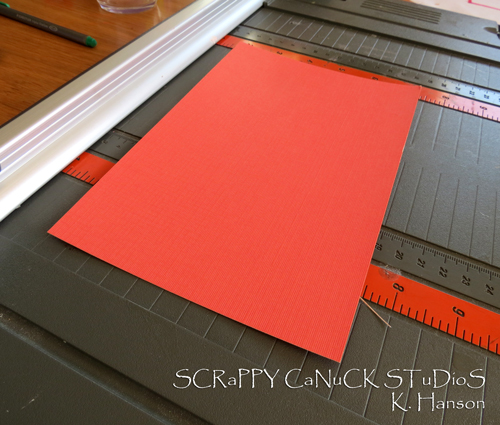
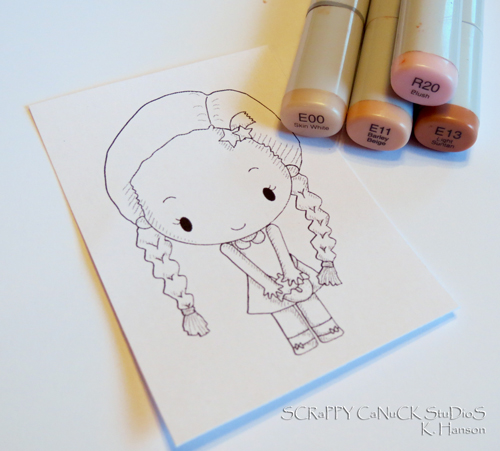
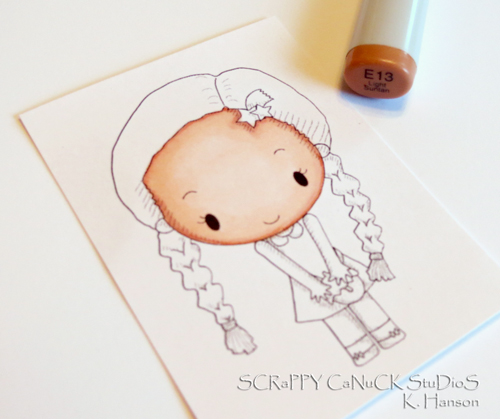
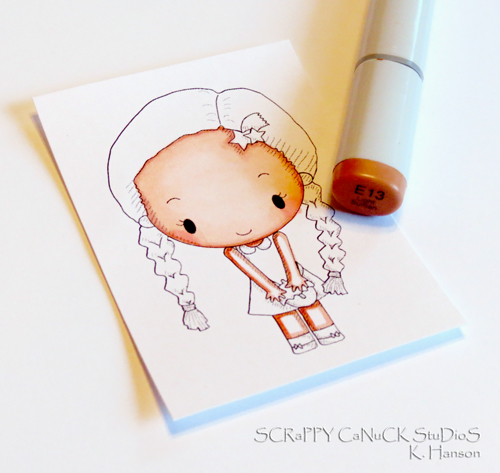
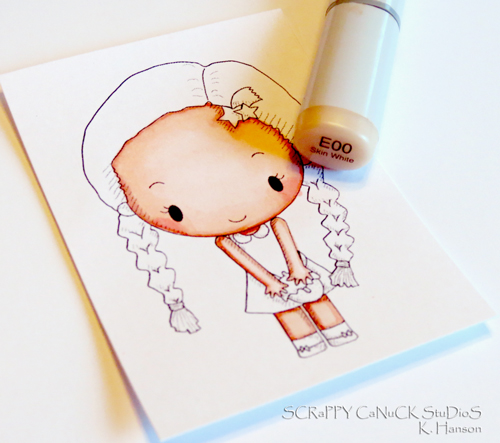
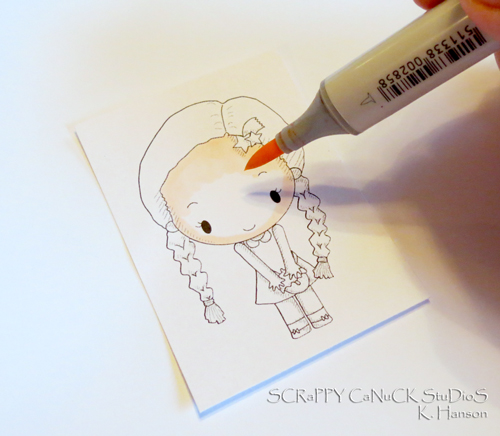
Choose 4 colours for your skin tone. The lightest colour will the one you see the most of - the others are used for definition and shading. For Copics, consider using E00, E11, E13 and R20 (this is a pink colour I use for the cheeks).
Step 2

CCT32

Using your lightest tone (E00) colour in the entire face area.

Step 3
CCT35

Using your second tone (E11), outline the edge of the face and along the hair line. Go back to your lightest tone (E00) and blend out the line that was created in small circular motions, moving from the line in towards the middle of the face.

Step 4

CCT33 

Using your darkest tone (E13), add another line around the edge of the face and hairline. Don't worry if this seems really dark...once you have the hair coloured in, this dark edge will look like a shadow. Note - I do not typically blend this colour in as I did with the second tone. I Like to have a sharper line for the shadows, but if you find this too harsh once you have coloured the hair, simply go back and blend it out.

Step 5

CCT34

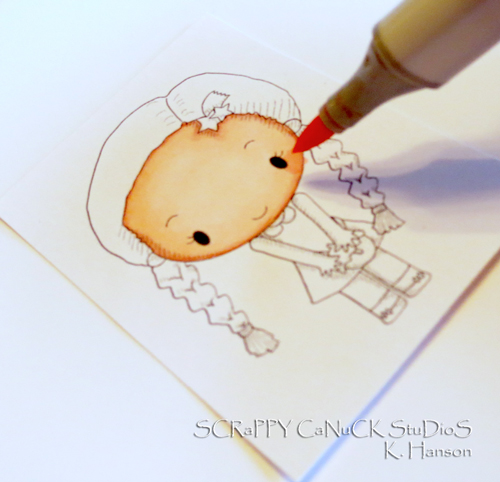
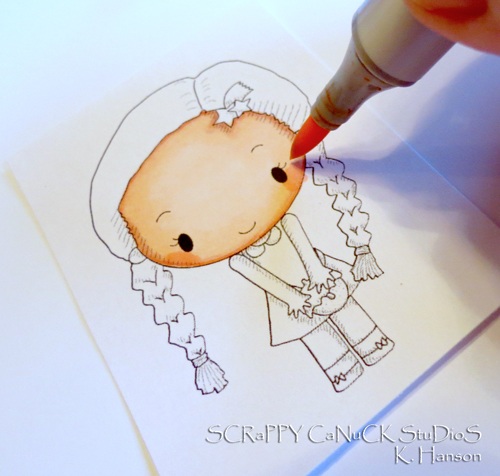
Using a light pink colour (R20), colour a small circle just below and to the side of each eye.

Step 6

CCT36

Using your lightest tone (E00), use small circles to blend out the edges of the rosy circles. I will blend all the way up to the ear line, and down towards the mouth. This will give a nice flushed look to the cheeks.

Step 7

CCT37

Take a step back and admire your work. Go back and blend any spots that seem blotchy or uneven.

Step 8

CCT38

For small arms and legs, I actually start with my second tone, work darker and then work lighter. There isn't a lot of room to blend, so I find this gives me the softer look I like for arms and legs.
Using your second tone (E11), outline the edges of the arms and legs. Don't forget spots against clothing or objects.

Step 9

CCT39

Using your darkest tone (E13), outline one side of each of the arms and legs (the side furthest from the light sourse you would like to use). In this image, I wanted thelight source coming from the right side, so the left side of each arm and leg received a nice, thin line of E13. At this stage, also make sure you use the darkest tone against all clothing lines.

Step 10

CCT310

Using your lightest tone (E00), work in small circles from the outside edges into towards the centre of each arm and leg.
And there you have it!

Challenge-closeup

Experiment with different colours and tones and adding shadows in different places. It can be a lot of fun to add dimension to the face, arms and legs, so don't be afraid to play a little!
And did you know that ChiChi Memories is now hosting a monthly challenge? If you don't have digis from them yet, go and grab this cutie for free and have some fun colouring! I can't wait to see what you come up with!

Challenge-angled

Thanks for stopping by today!

Wednesday, July 17, 2013

Another awesome tutorial by Karen.

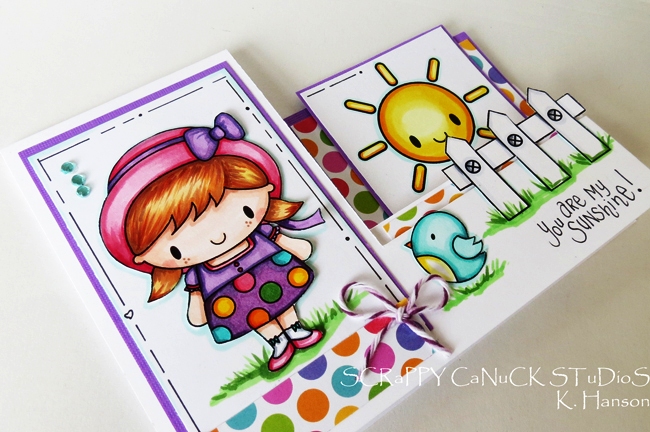
It tutorial time for Chi Chi Memories today, so I thought I would share a great fun fold for you to consider on your next card. Side step cards are great when you want to play around with multiple tamped images and sentiments. This is perfect for digi sets like the one I used for my card called "Spring is here".

CCMT2-full

CCMT2-angled

You can see from the side that there are three folds and create step effect on the one side of the card. Sometimes i use this space for the sentiment, but I thought it was perfect for adding the sun in the background on this card. This is a standard 4 1/4" by 51/2" card when finished, so you can still use a standard envelope. Here's how you can create one in under 5 minutes!

CCMT2-closeup
Materials:
  • cardstock for base
  • craft knife
  • scoring board and bone folder (not necessary, but will make the project much easier)
  • straight edge ruler
  • For embellishments - stamps (like this cutie from ChiChi Memories), patterned paper
  • Optional - other fun embellishments like Trendy Twine of some rhinestones
Step 1

CCMT21

Cut a piece of cardstock 8 1/2" X 5 1/2".

Step 2

CCMT23

Place your card on your scoring board with the longest edge running across the top. Place your straight edge across the 3" mark. Score down to your straight edge at the 2 1/4" mark, the 4 1/4" mark, 5 1/2" mark, 6 1/2" mark and 7 1/4" mark.

Step 3

CCMT24

Using a craft knife cut along your straight edge starting at the 2 1/4" score line you made, and ending at the 7 1/4" score line.

Step 4

CCMT22

Extend the 4 1/4" score line all the way to the other side and fold your card in half (or you can do what I usually do, and just fold it in half without the score line...I know, I know, it's not as precise, but it still works)!

Step 5

CCMT25

Starting with the 7 1/4" score line, create a mountain fold by folding the paper back on itself at this score line. At the next score line, create a valley fold. Continue with the rest of the folds. Place your card down and run your bone folder along all of your creases to get them nice and compact and crisp.

Step 6

CCMT2-dimension

Embellish!

It really is that easy! Once you get comfortable with the folds, you can also play around with the dimensions to get wider and narrower spaces for stamps and sentiments!
Thanks for stopping by, and go give it a try!

Wednesday, June 19, 2013

A super cute tutorial by Karen.

Tutorial-slider-full

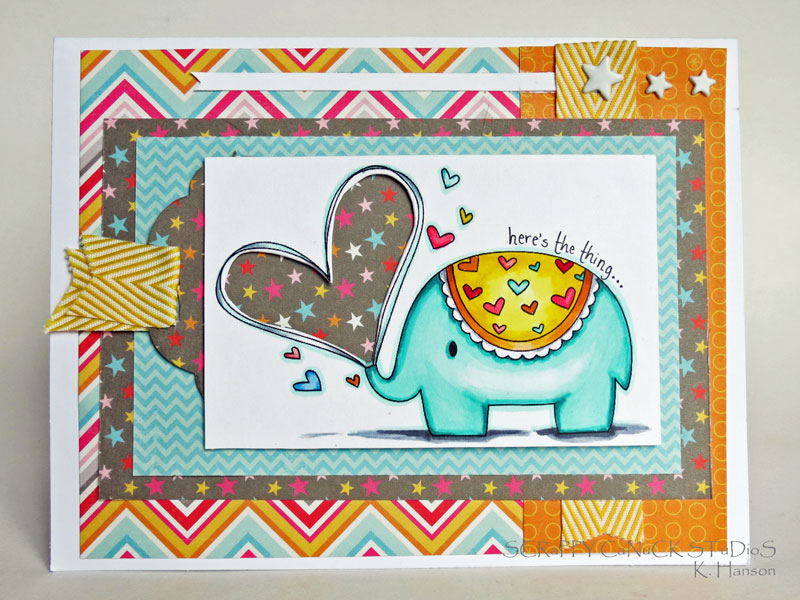
When I first started ScrappyCanuck Studios, I found out how much I loved creating tutorials - which makes sense because I am actually a teacher by trade. But I have to admit that the tutorials have been few and far between lately. However, when I joined the ChiChi Memories design team, they asked if I would be willing to take on one tutorial a month. This was a perfect opportunity to dust off the the old tut hat and get back at it!

So I am really excited to have one for you today!

Tutorial-slider-open


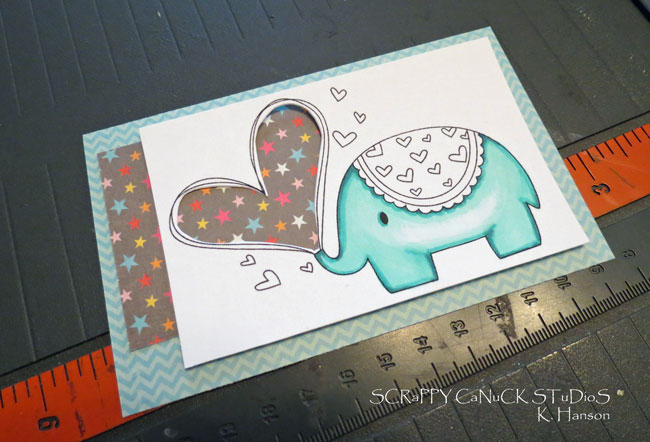
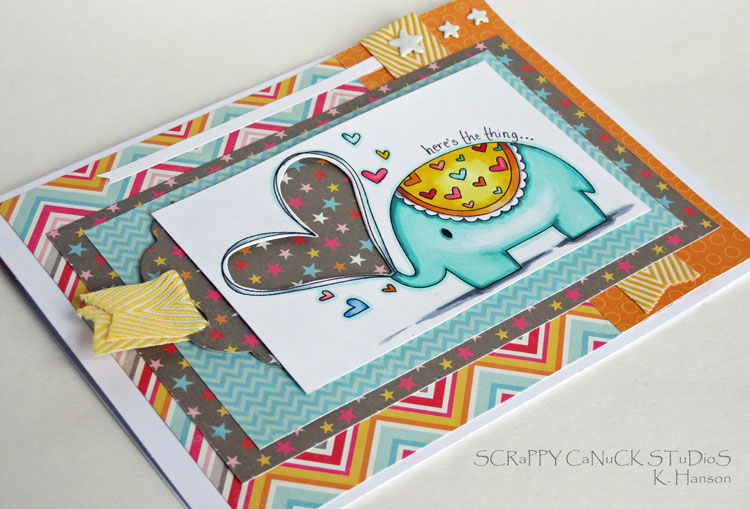
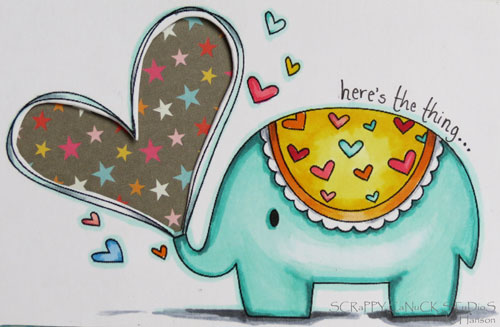
For this little card, I used one of my favourite ChiChi memories stamps called "Elephant Love". In the digi, the heart is actually empty, and I thought that since it was such a great space, it might be fun to create a sentiment slider to enhance this adorable part of the image. So, when closed, the heart is filled with a fun paper pattern, and when open, the sentiment is revealed. It looks far more complicated than it really is - really! Let me show you how:


Materials for slider component:
Tutorial-slider-closeup1


Instructions:
Step 1
CCMT11

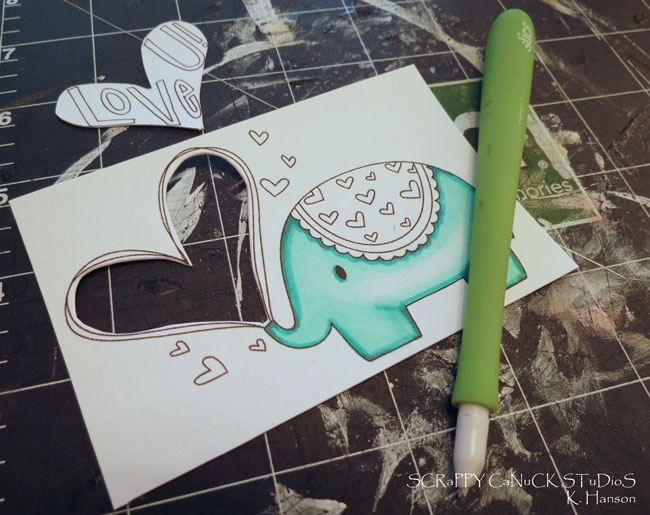
Using a craft knife, carefully cut around the inside of your printed digi. If you are planning on doodling in the cut out, you can do this now or after the slider is assembled.

Step 2

CCMT12

Using a piece of patterened paper, cut out a piece that is at least 1" longer than your stamped image. When placed in the middle, the patterned paper should extend out at least 1/2" from both the right and left sides.

Step 3

CCMT13

Cut a piece of coordinated pattern paper (star paper in this photo) that is as 1/2" longer than your stamped image, and just wide enough to cover the cutout in the stamped image.

Step 4

CCMT14

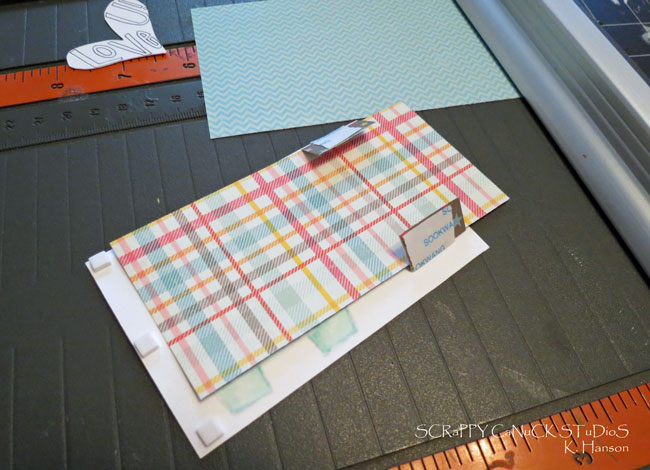
Test fit your papers by placing piece 2 under your stamped image, but on top of piece 1. You want to make sure that part of piece two sticks out on one side as this will become your pull tab.

Step 5

CCMT15

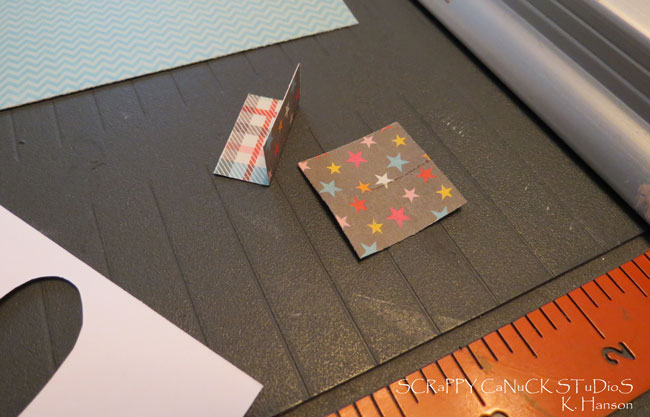
Using any piece of scrap paper, cut 2 1" squares and fold in half (these are the runners for your slider and will not be seen, so do not worry about the appearance of the paper.

Step 6

CCMT16

Turn over your stamped image, and place piece two on top in the appropriate place, covering the stamp cut out. Place some adhesive on each of your 1" square tabs and slide them underneath piece 2, pressing down on the adhesive to hold the slider in place. Add three small foam adhesive square to the far end to compensate for the thickness created by the slider and the tracks for the slider. This will also act as a stopper on the far end.

Step 7

CCMT17

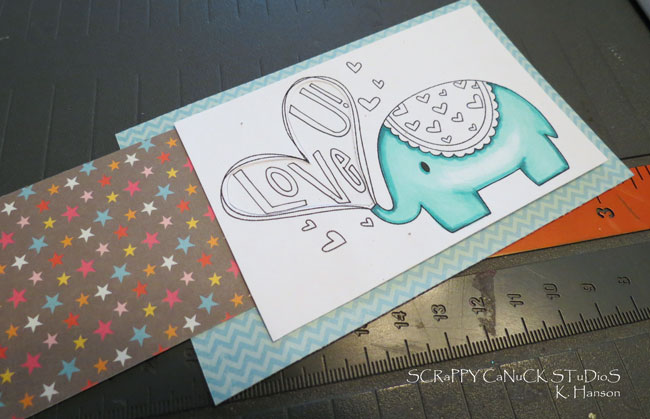
Take the backing off of all of your adhesive, turn over the stamped image and slider and adhere to piece 1 of your patterned paper. pull out on piece 2 to make sure it easily slides in and out.

Step 8

CCMT18

Pull the slider out as far as it will go without moving past the cutout. Take your cutout shape and glue it in place onto piece. You want to make sure to glue down the edges well so it does not get caught on the slider as it is moving past the cutout section.

Step 9

CCMT19

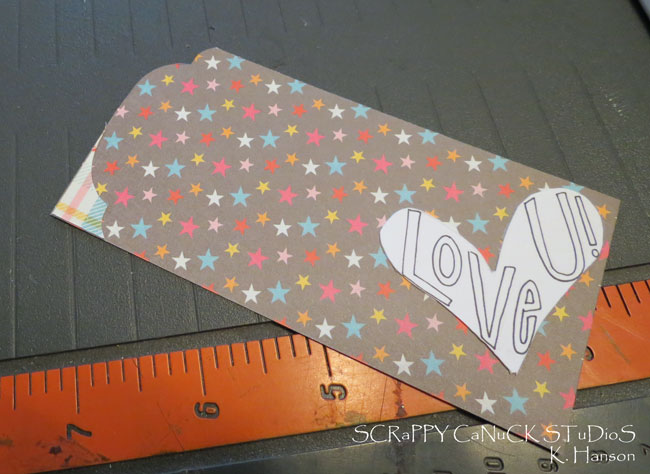
Optional - Pull out piece 2 completely and cut a decorative edge on the left side (I cut one side and then used the scrap piece as a template for cutting the other side).

Step 10

Tutorial-slider-dimension

Adhere the stamp and slider on to your card base and embellish. I finished colouring my images at this point to get good colour matching, and added a bit of ribbon to my pull tab.
Variations - If the cutout section seems like a bit too much for you, and great variation would be simply to use the same technique to create a pocket for hidden message.
Phew - I think that's it for me today! Thanks for popping by, and I hope you will give this technique for a sentiment slider a try!

Tutorial-slider-closeup2
Related Posts Plugin for WordPress, Blogger...